
Disappearing Four Patch {a tutorial}

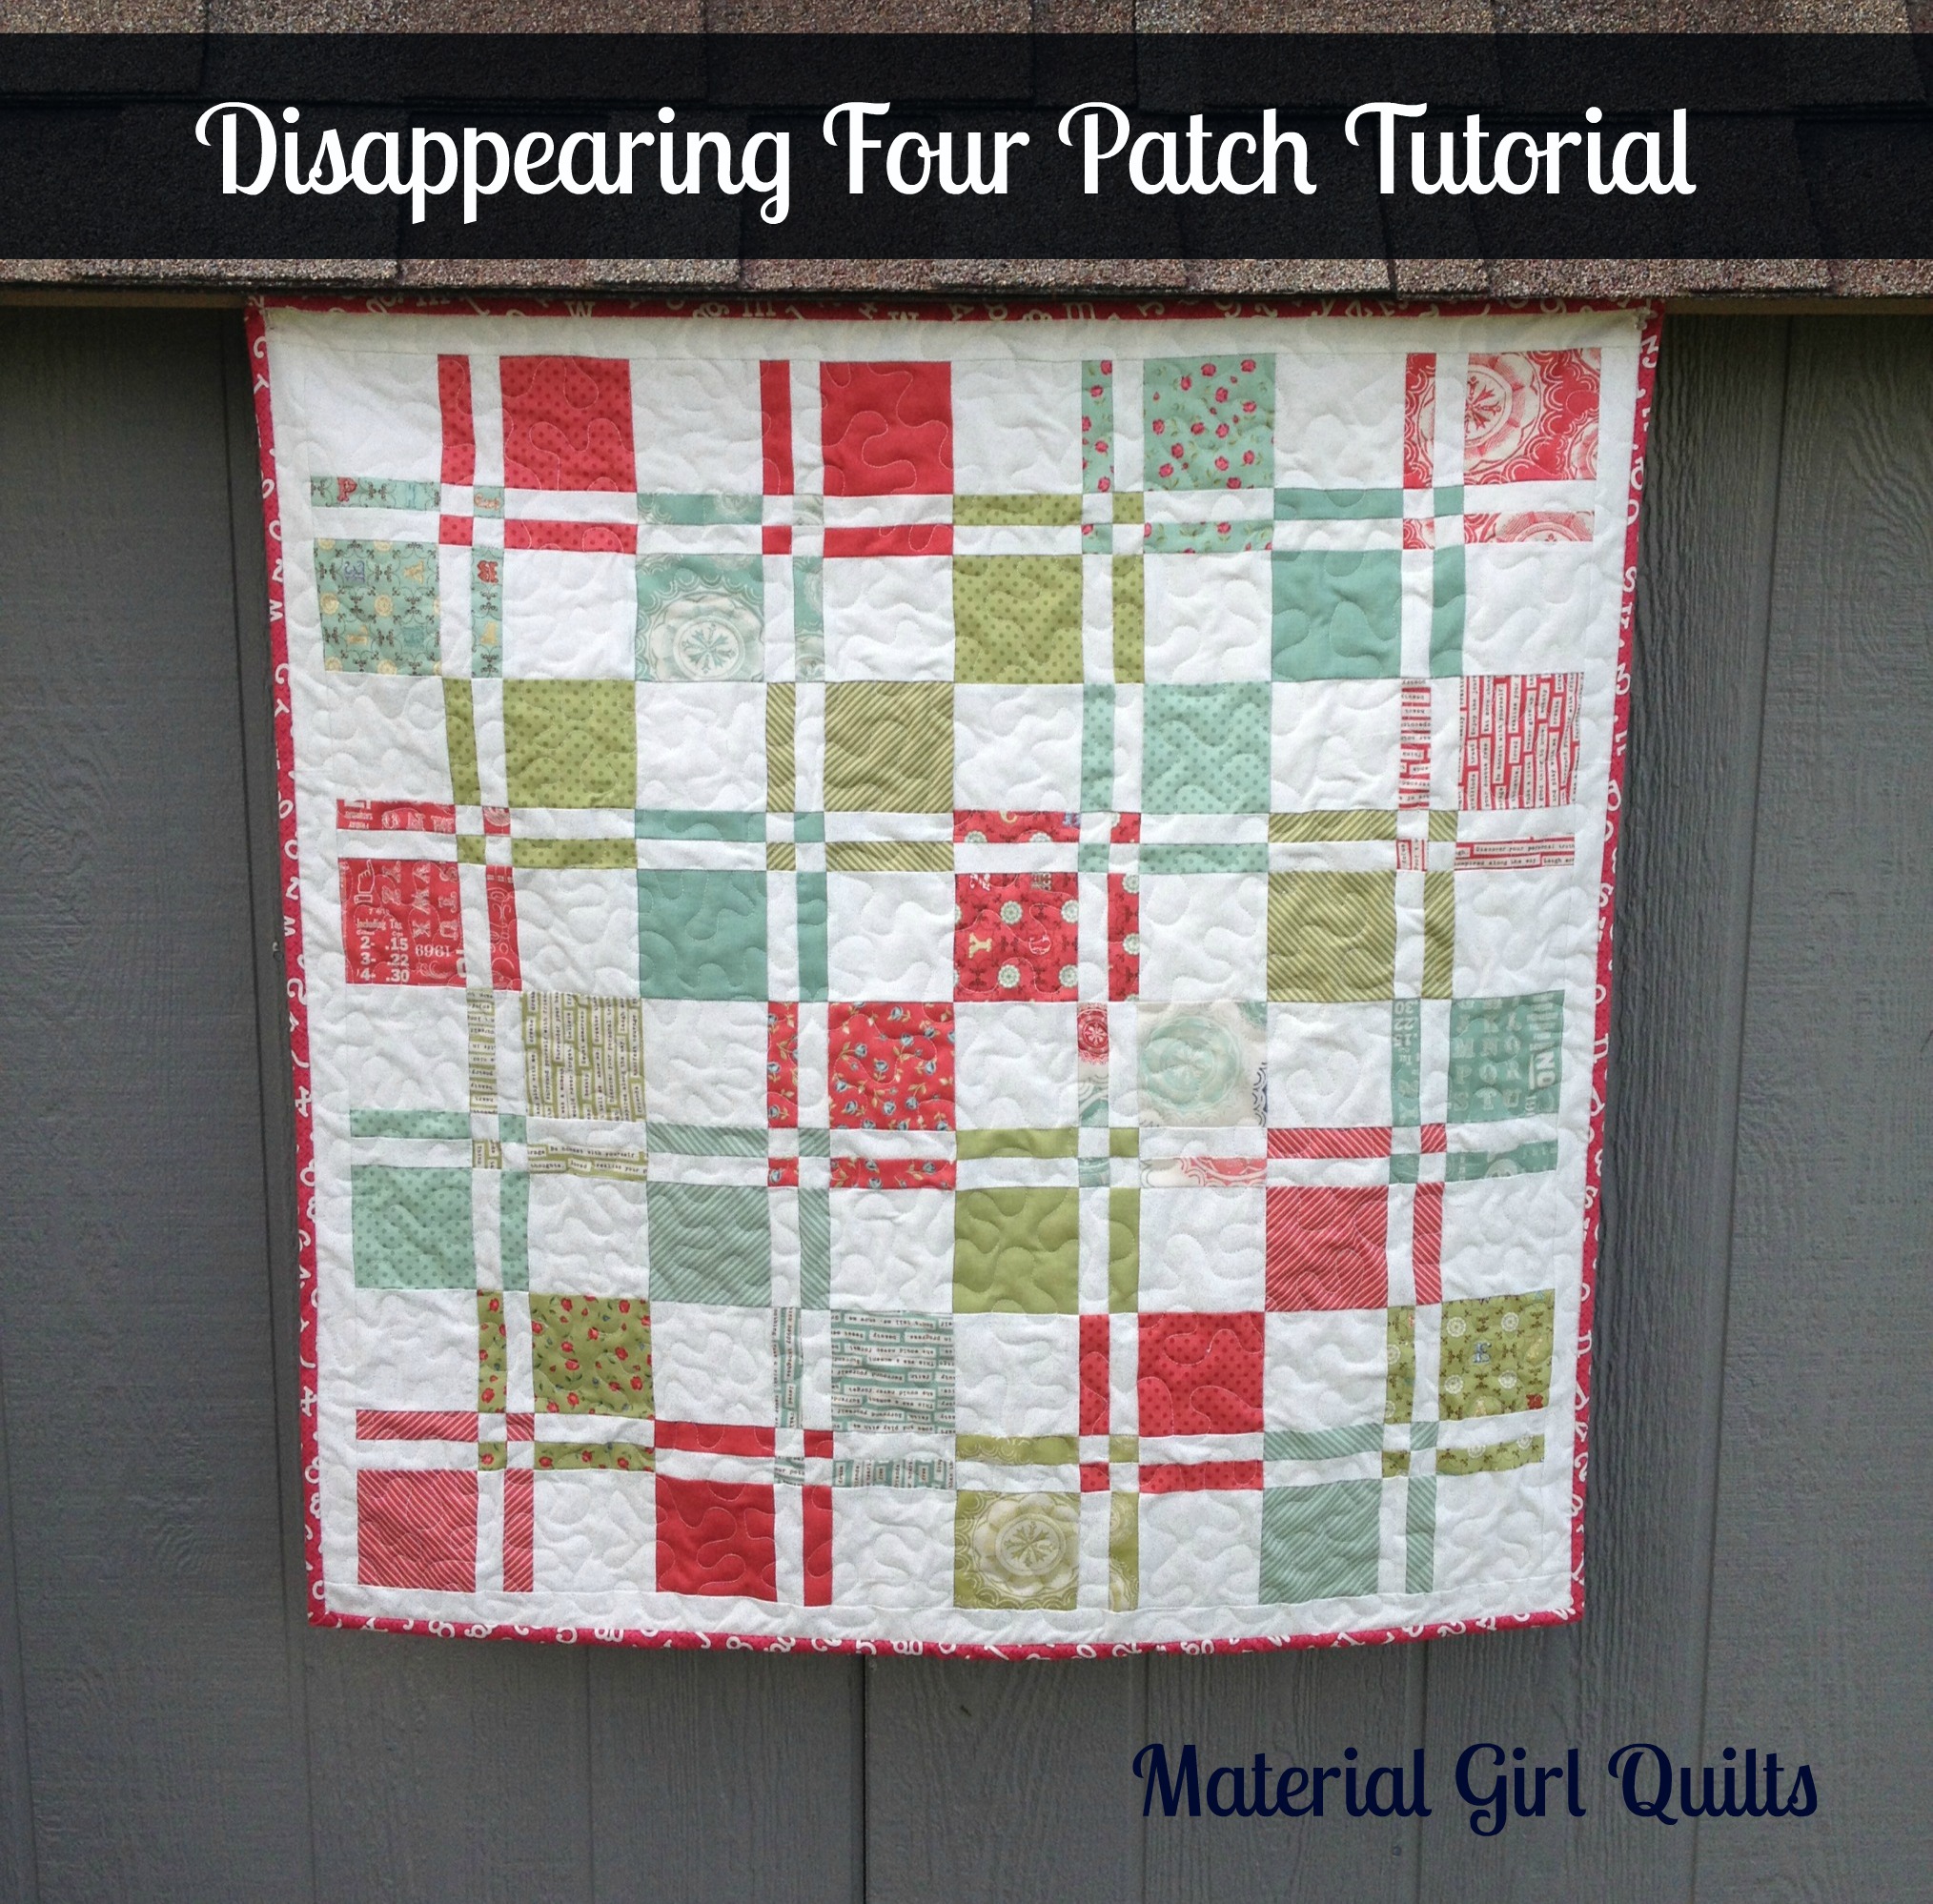 After showing my latest baby quilt top, some of you asked how to make the disappearing four patch blocks. So I decided to create a little tutorial. My version uses 5" squares, so it works great with charm packs!
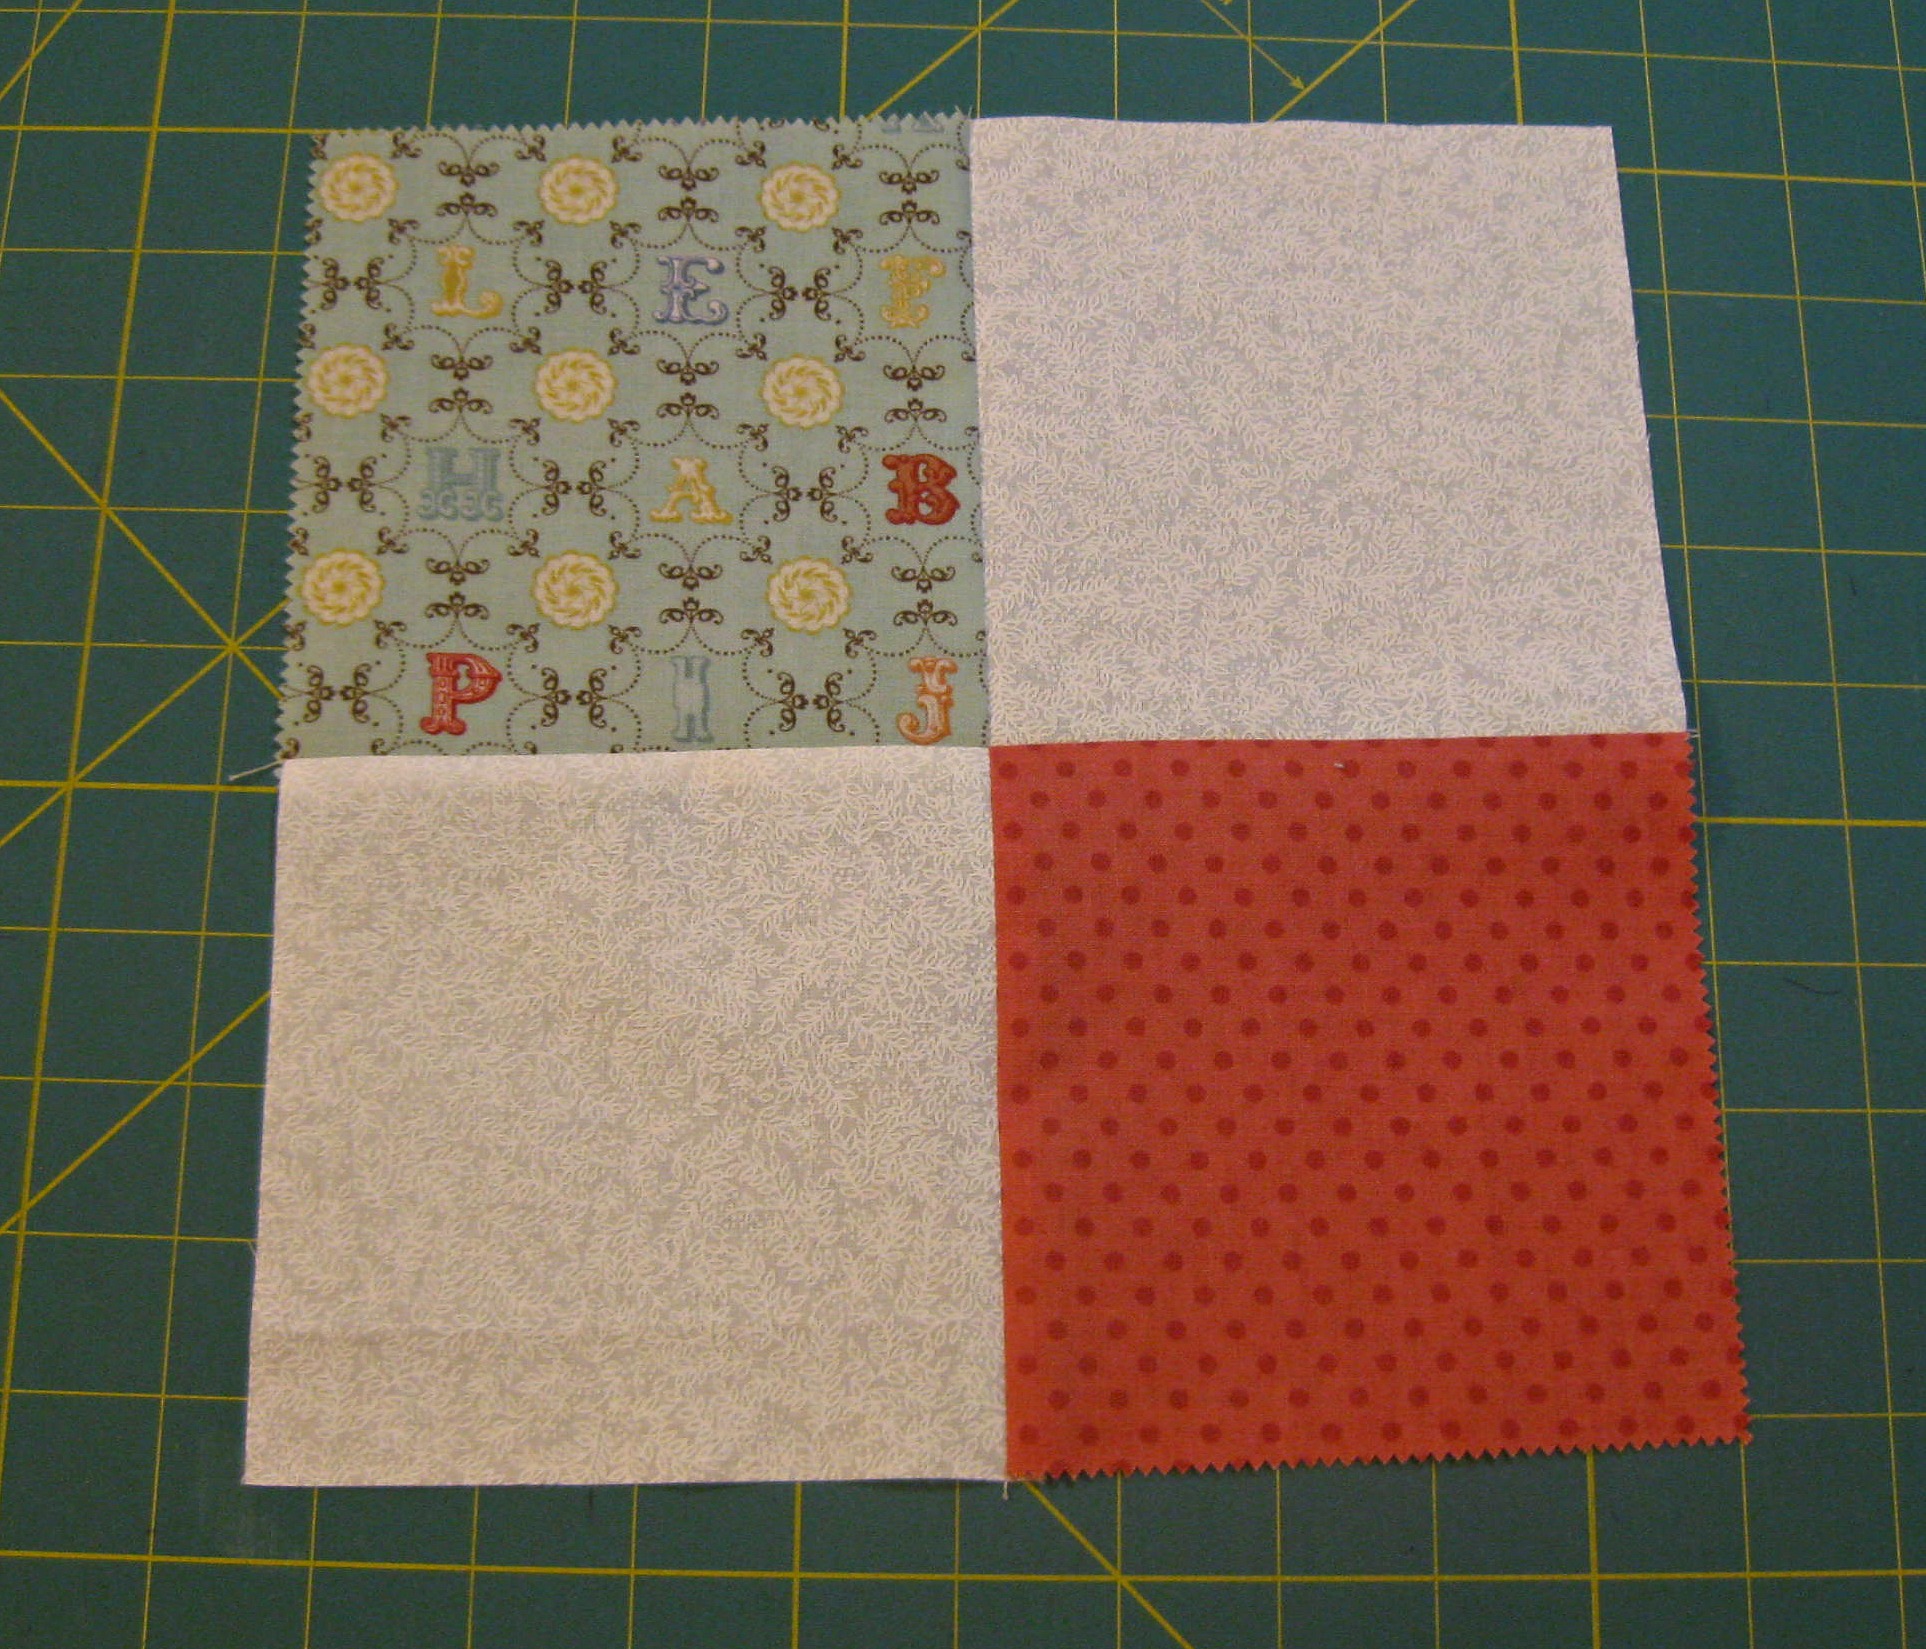
Select 2 print 5" squares and 2 background 5" squares and piece into a four patch block as shown below. Press seams away from the background fabric in each pair and then press to one side after piecing all four together.
Now, measure 1" on either side of the center seams and cut. You will then end up with nine separate block pieces as shown below.

Next, you will swap the top row/center piece with the middle row/left piece. You will also swap the middle row/right piece with the bottom row/center piece. Lastly you will rotate the middle row/center piece 180 degrees. The result will look like the photo below.

Sew the pieces back together and you end up with this cute little block that finishes at 8"!

I just love the tiny little four patch it creates in the center of each block :)
I hope this helps for those of you who were asking. Please let me know if you have any questions.
