Golden Brick Road to Fort Firefly {a finished quilt and tutorial!}
Last week I spent some time cleaning out my sewing room stash (selling a few items, gathering others for donations, etc.) and came across this fat quarter bundle that I purchased several years ago. It is Fort Firefly by Birch fabrics. I still simply adore everything about this collection! The colors, prints, fireflies! It is one of my all time favorite collections for sure.

Since fall is just around the corner, I decided it was finally time to cut into these beauties. I poured through all of my patterns, Pinterest, etc. for a quick FQ quilt that would showcase these prints like I felt they deserved. Nothing in particular seemed to call to me, so I decided to just cut each fat quarter into rectangles and make a brick quilt. I still have yardage leftover from my shop of the PERFECT golden shade Moda crossweave fabric that I used for the sashing...these organic cotton prints combined with the crossweave is a quilty match made in heaven! I used the same crossweave on the back and binding. It is so dreamy and soft :)
Then I came up with the name Golden Brick Road to Fort Firefly, and yes my husband is correct that it is probably the longest quilt name ever, but it just fits. In my effort to get this done as quickly as possible (and back to the other WIPS I had currently been working on...OOPS!) I decided to do a loopy meander free motion quilting design using Aurifil 50 wt. #2132 "Tarnished Gold" which was the perfect shade to match the sashing and backing fabric.

A Sunday afternoon spent watching football games and this quilt was bound :) The quilt finished at 64" x 72", the perfect throw size for my son and I to snuggle under on the couch.
If you'd like to make a similar quilt, below are the details. You will need 13 fat quarters and 1 3/4 yards sashing fabric to make this size.

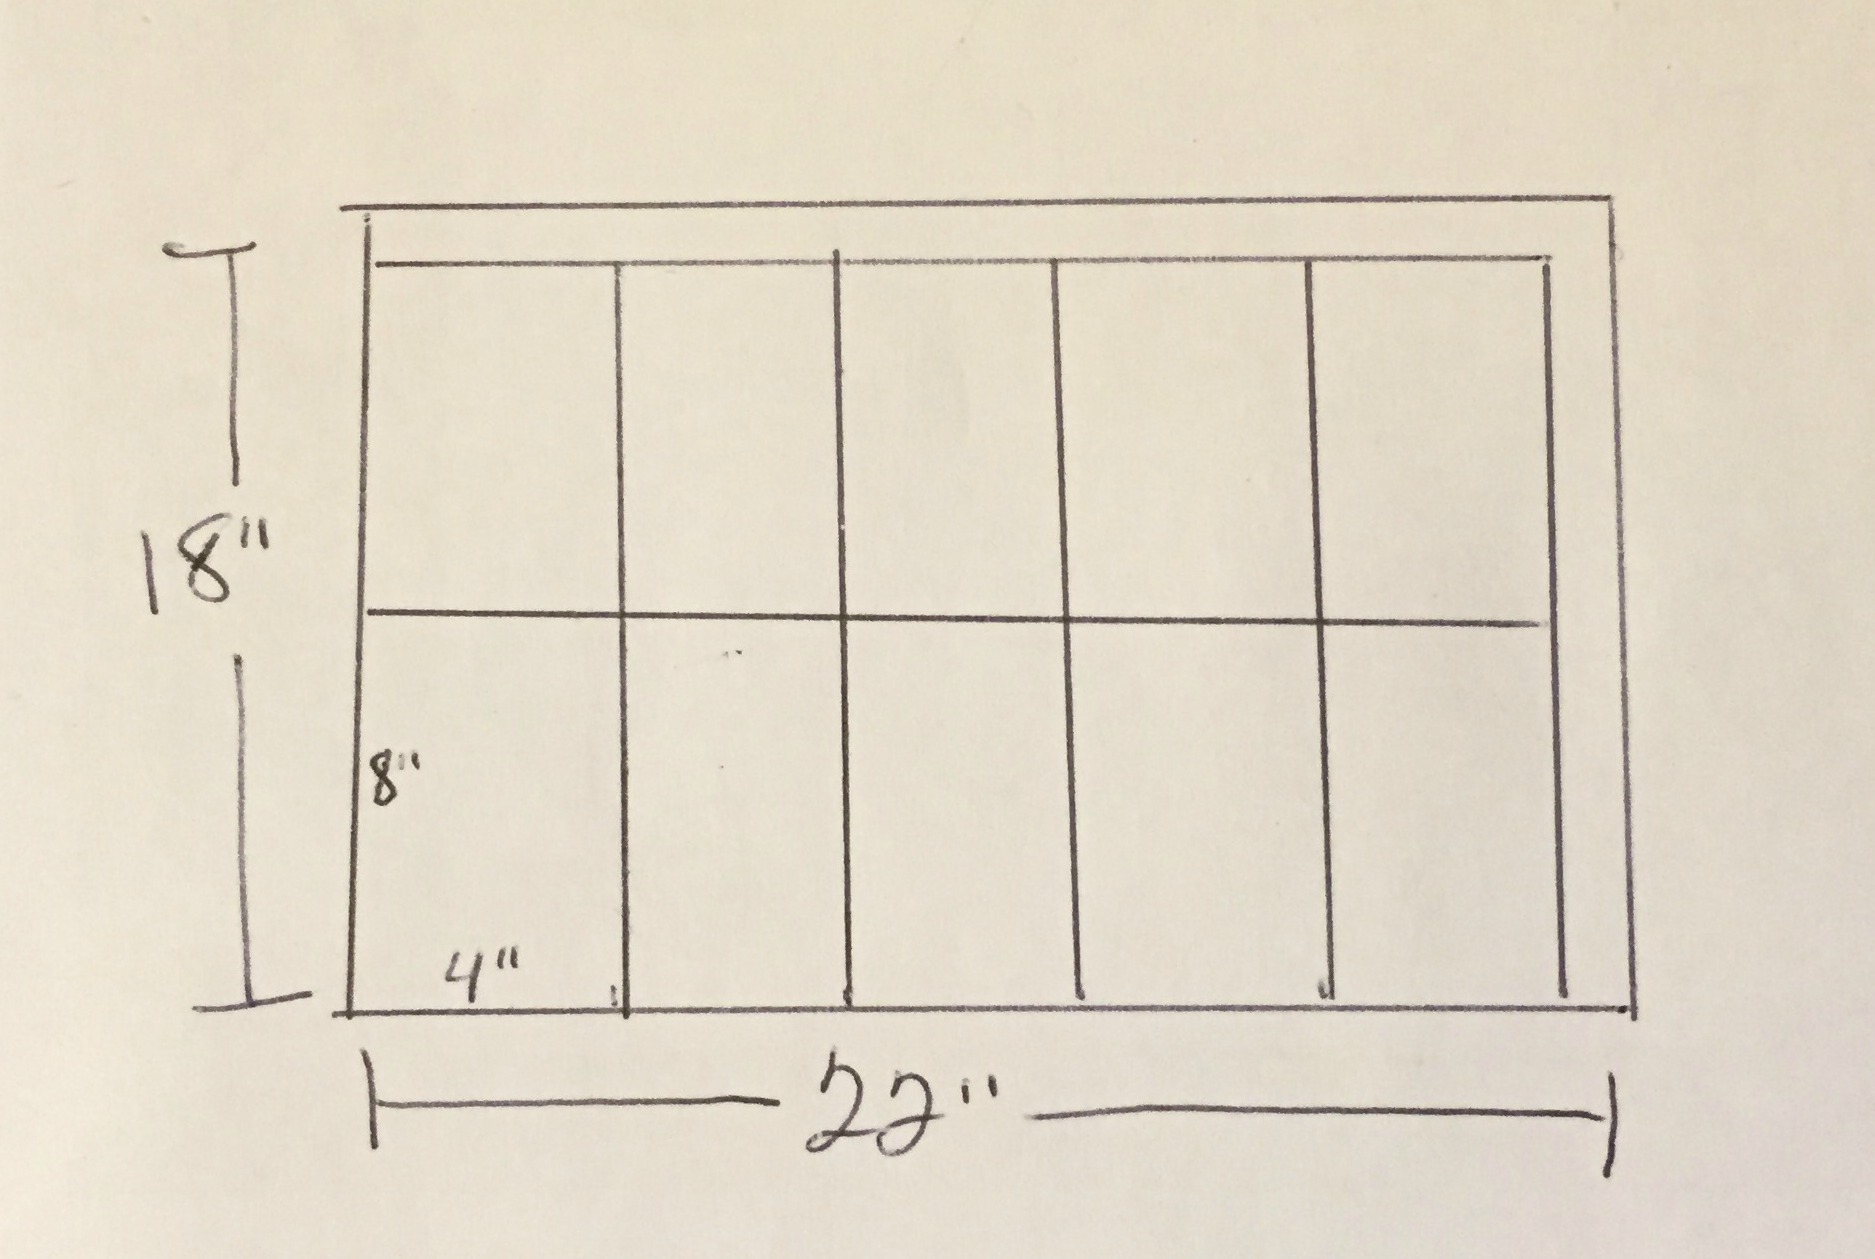
- Cut each FQ into ten 4" x 8" rectangles as shown above. I know this is a funny cut size, but this is what worked best to showcase these prints and there was little waste after cutting, so you basically use up the entire fat quarter. Since I had 13 FQs, that gave me 130 rectangle bricks.
- Lay the rectangles bricks out into 14 "columns" of 9 bricks each, spreading out each print and color so that it seems balanced. This will use a total of 126 bricks. If you have more fat quarters, you can make your columns longer or add more of them to the width to suit your needs. To get the staggered look, you will need to cut the BOTTOM brick in each odd numbered column down to 3 3/4" x 4" (so columns, 1, 3, 5, 7, 9, 11, 13) and then cut the TOP brick down to 3 3/4" x 4" in each even numbered column (columns 2, 4, 6, 8, 10, 12, 14). This will make sure that your sashing will hit in the middle of the bricks in the columns next to each other.
- Cut eleven 1 1/2" x width of fabric strips from your sashing. Sub-cut into 112 - 1 1/2" x 4" rectangles. Lay these sashing rectangles between the bricks in each column.
- Sew together each column of bricks and sashing rectangles, pressing your seams open.
- Cut thirty 1 1/2" x width of fabric strips from your sashing fabric. Piece together in sets of two strips each and trim to match the length of your columns.
- Sew the pieced sashing strips onto the right side of each column. Column no. 1 will get sashing on both the left and right sides.
- Sew sashed columns together into the quilt top and you are done!
Thanks so much for stopping by and if you have any questions, just let me know. I'm happy to help :)
Amanda


