
Bear Paw quilt block tutorial
Happy Monday friends! Today I’m sharing a tutorial for one of my favorite classic quilt blocks, the Bear Paw. Over the past couple of months my friends at Riley Blake and I have been making one classic quilt block a week (or at least one block design - some are making numerous of each block design!). If you head to my Instagram or search the hashtag #RBDblockchallenge you can see all of the beautiful blocks that have been created so far.
For those of us sharing tutorials, we decided to stick with 6” and 12” options to make it simpler for folks to mix and match their blocks into a sampler quilt if they’d like. Unfortunately for this block, those sizes don’t equate to the simplest cutting measurements! I chose to make mine 12” finished. All of those half square triangles would be very tiny in a 6” block, but if you are feeling like a challenge, then go for it!
Below are the cutting instructions for each size block.
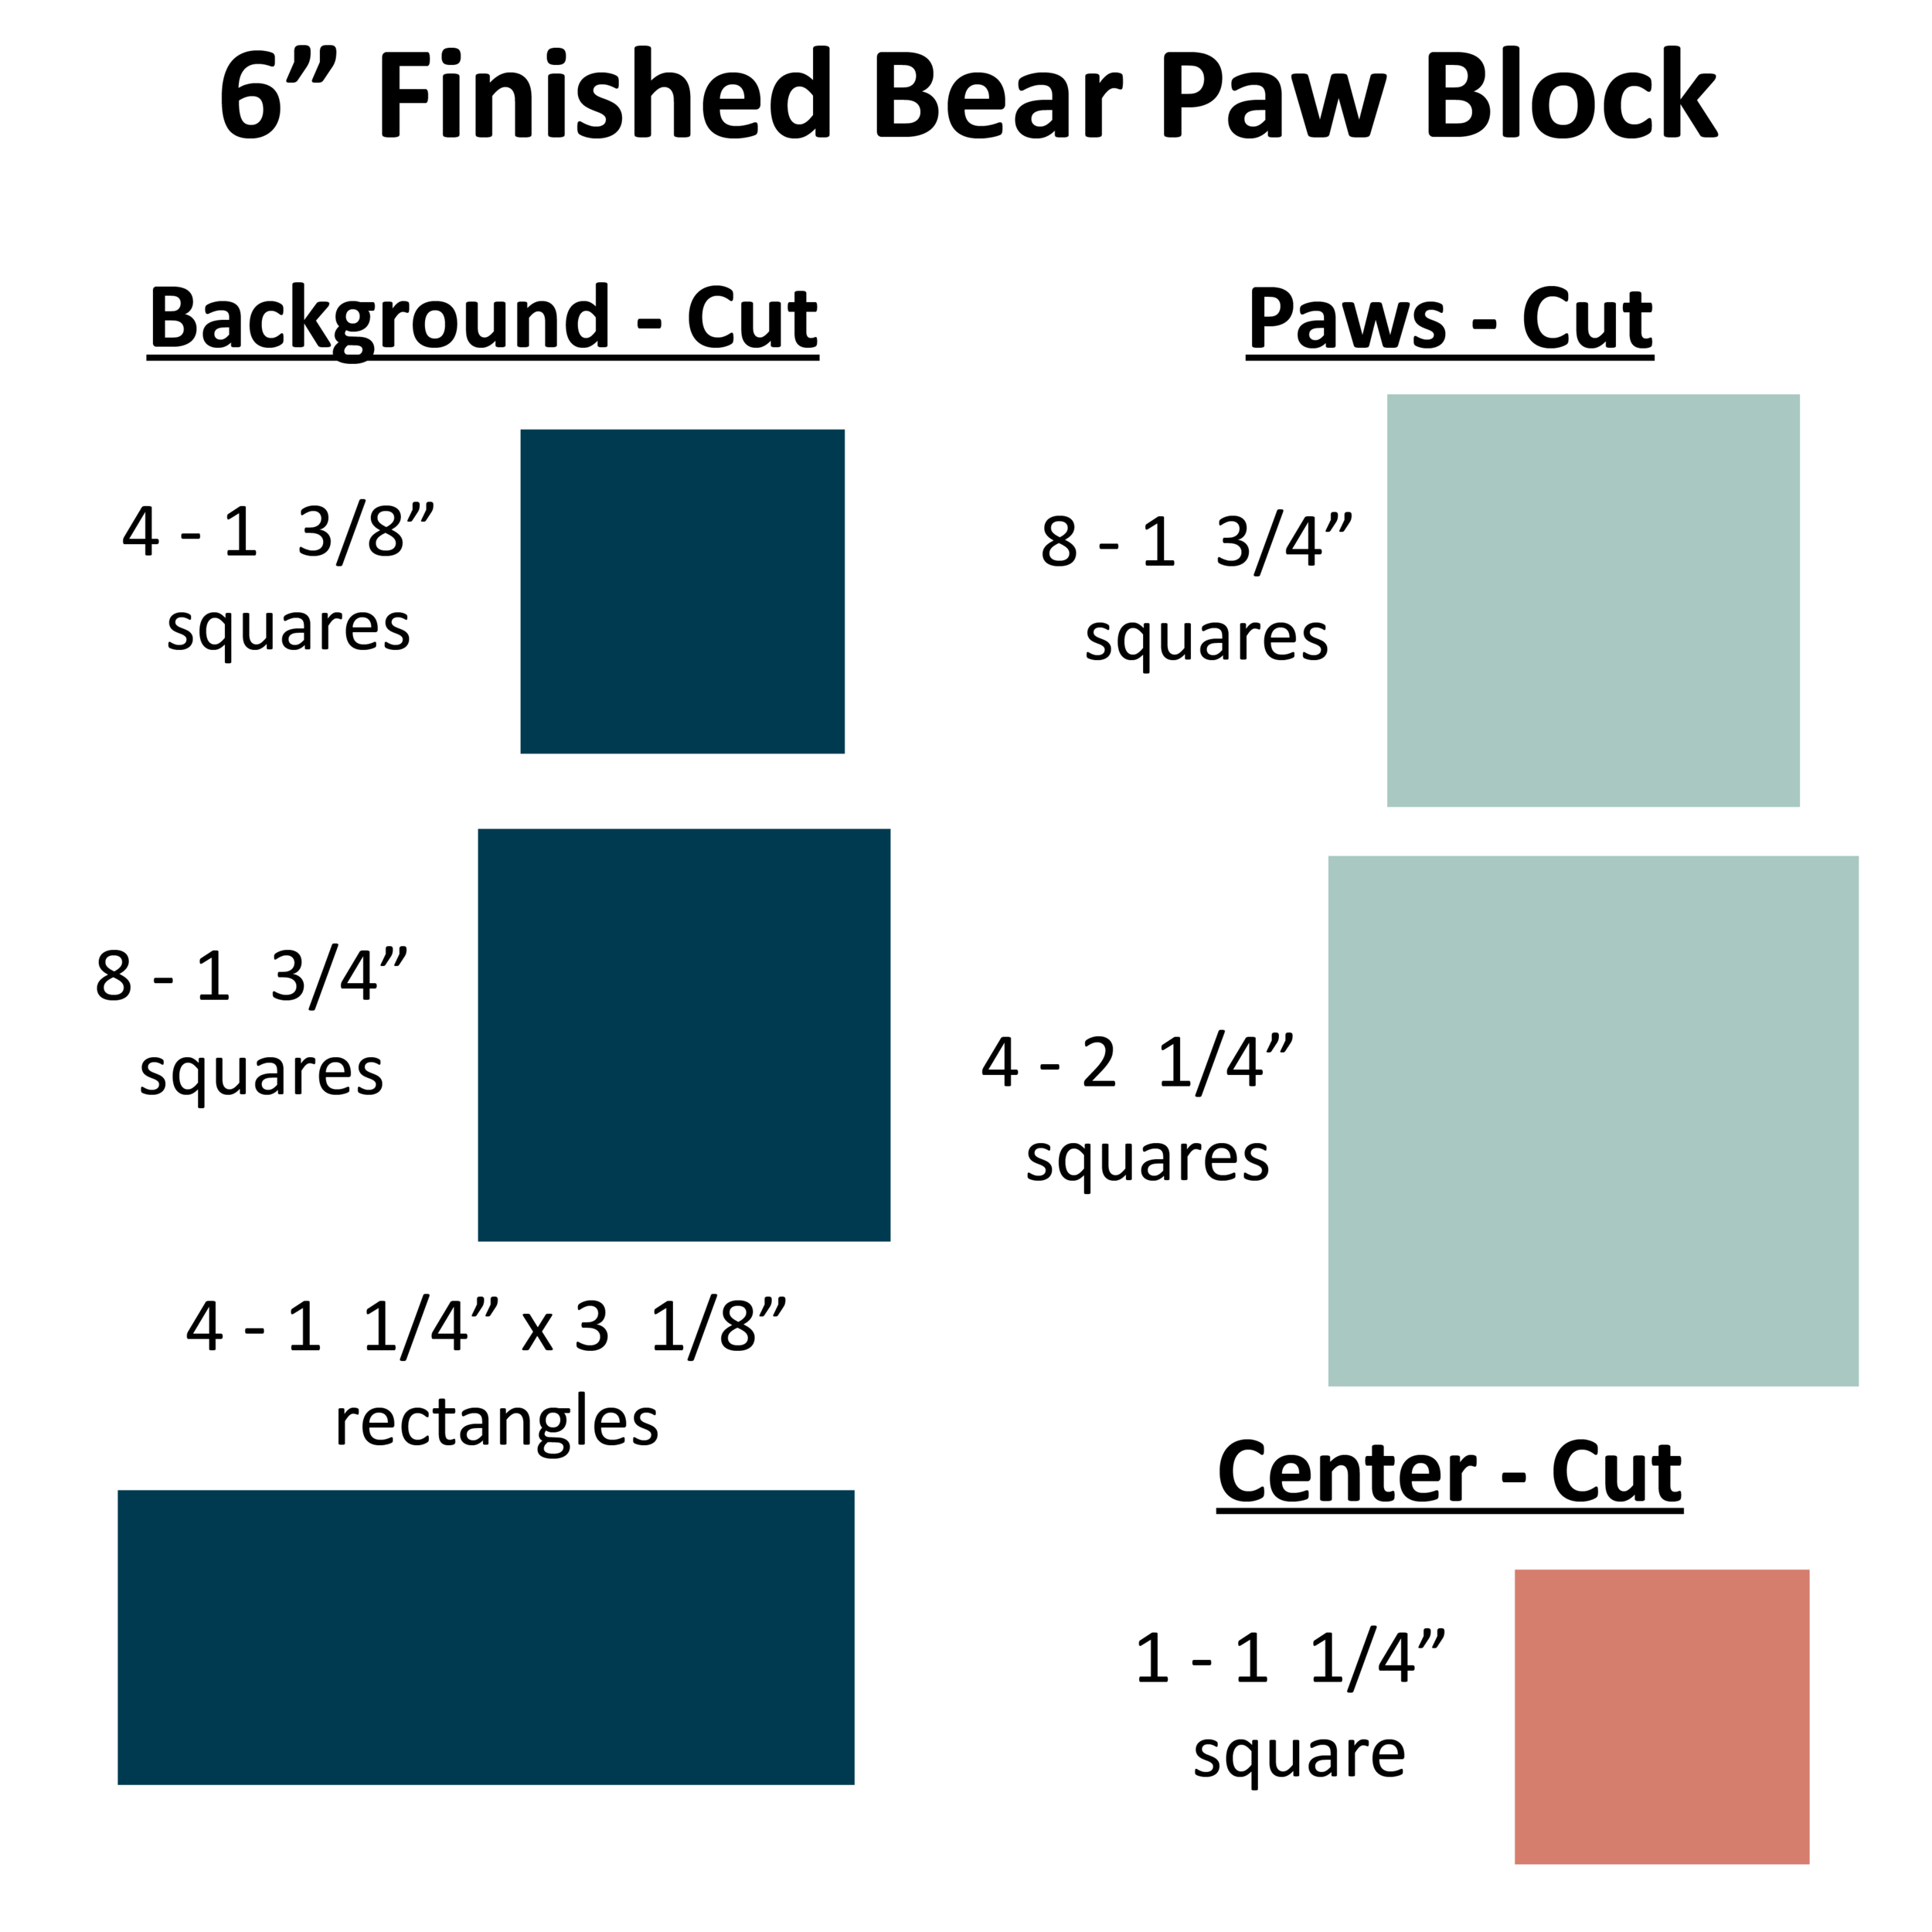

Once you have your pieces cut, you will start by making half square triangles using the 8 background and 8 bear paw fabric squares paired as shown below.

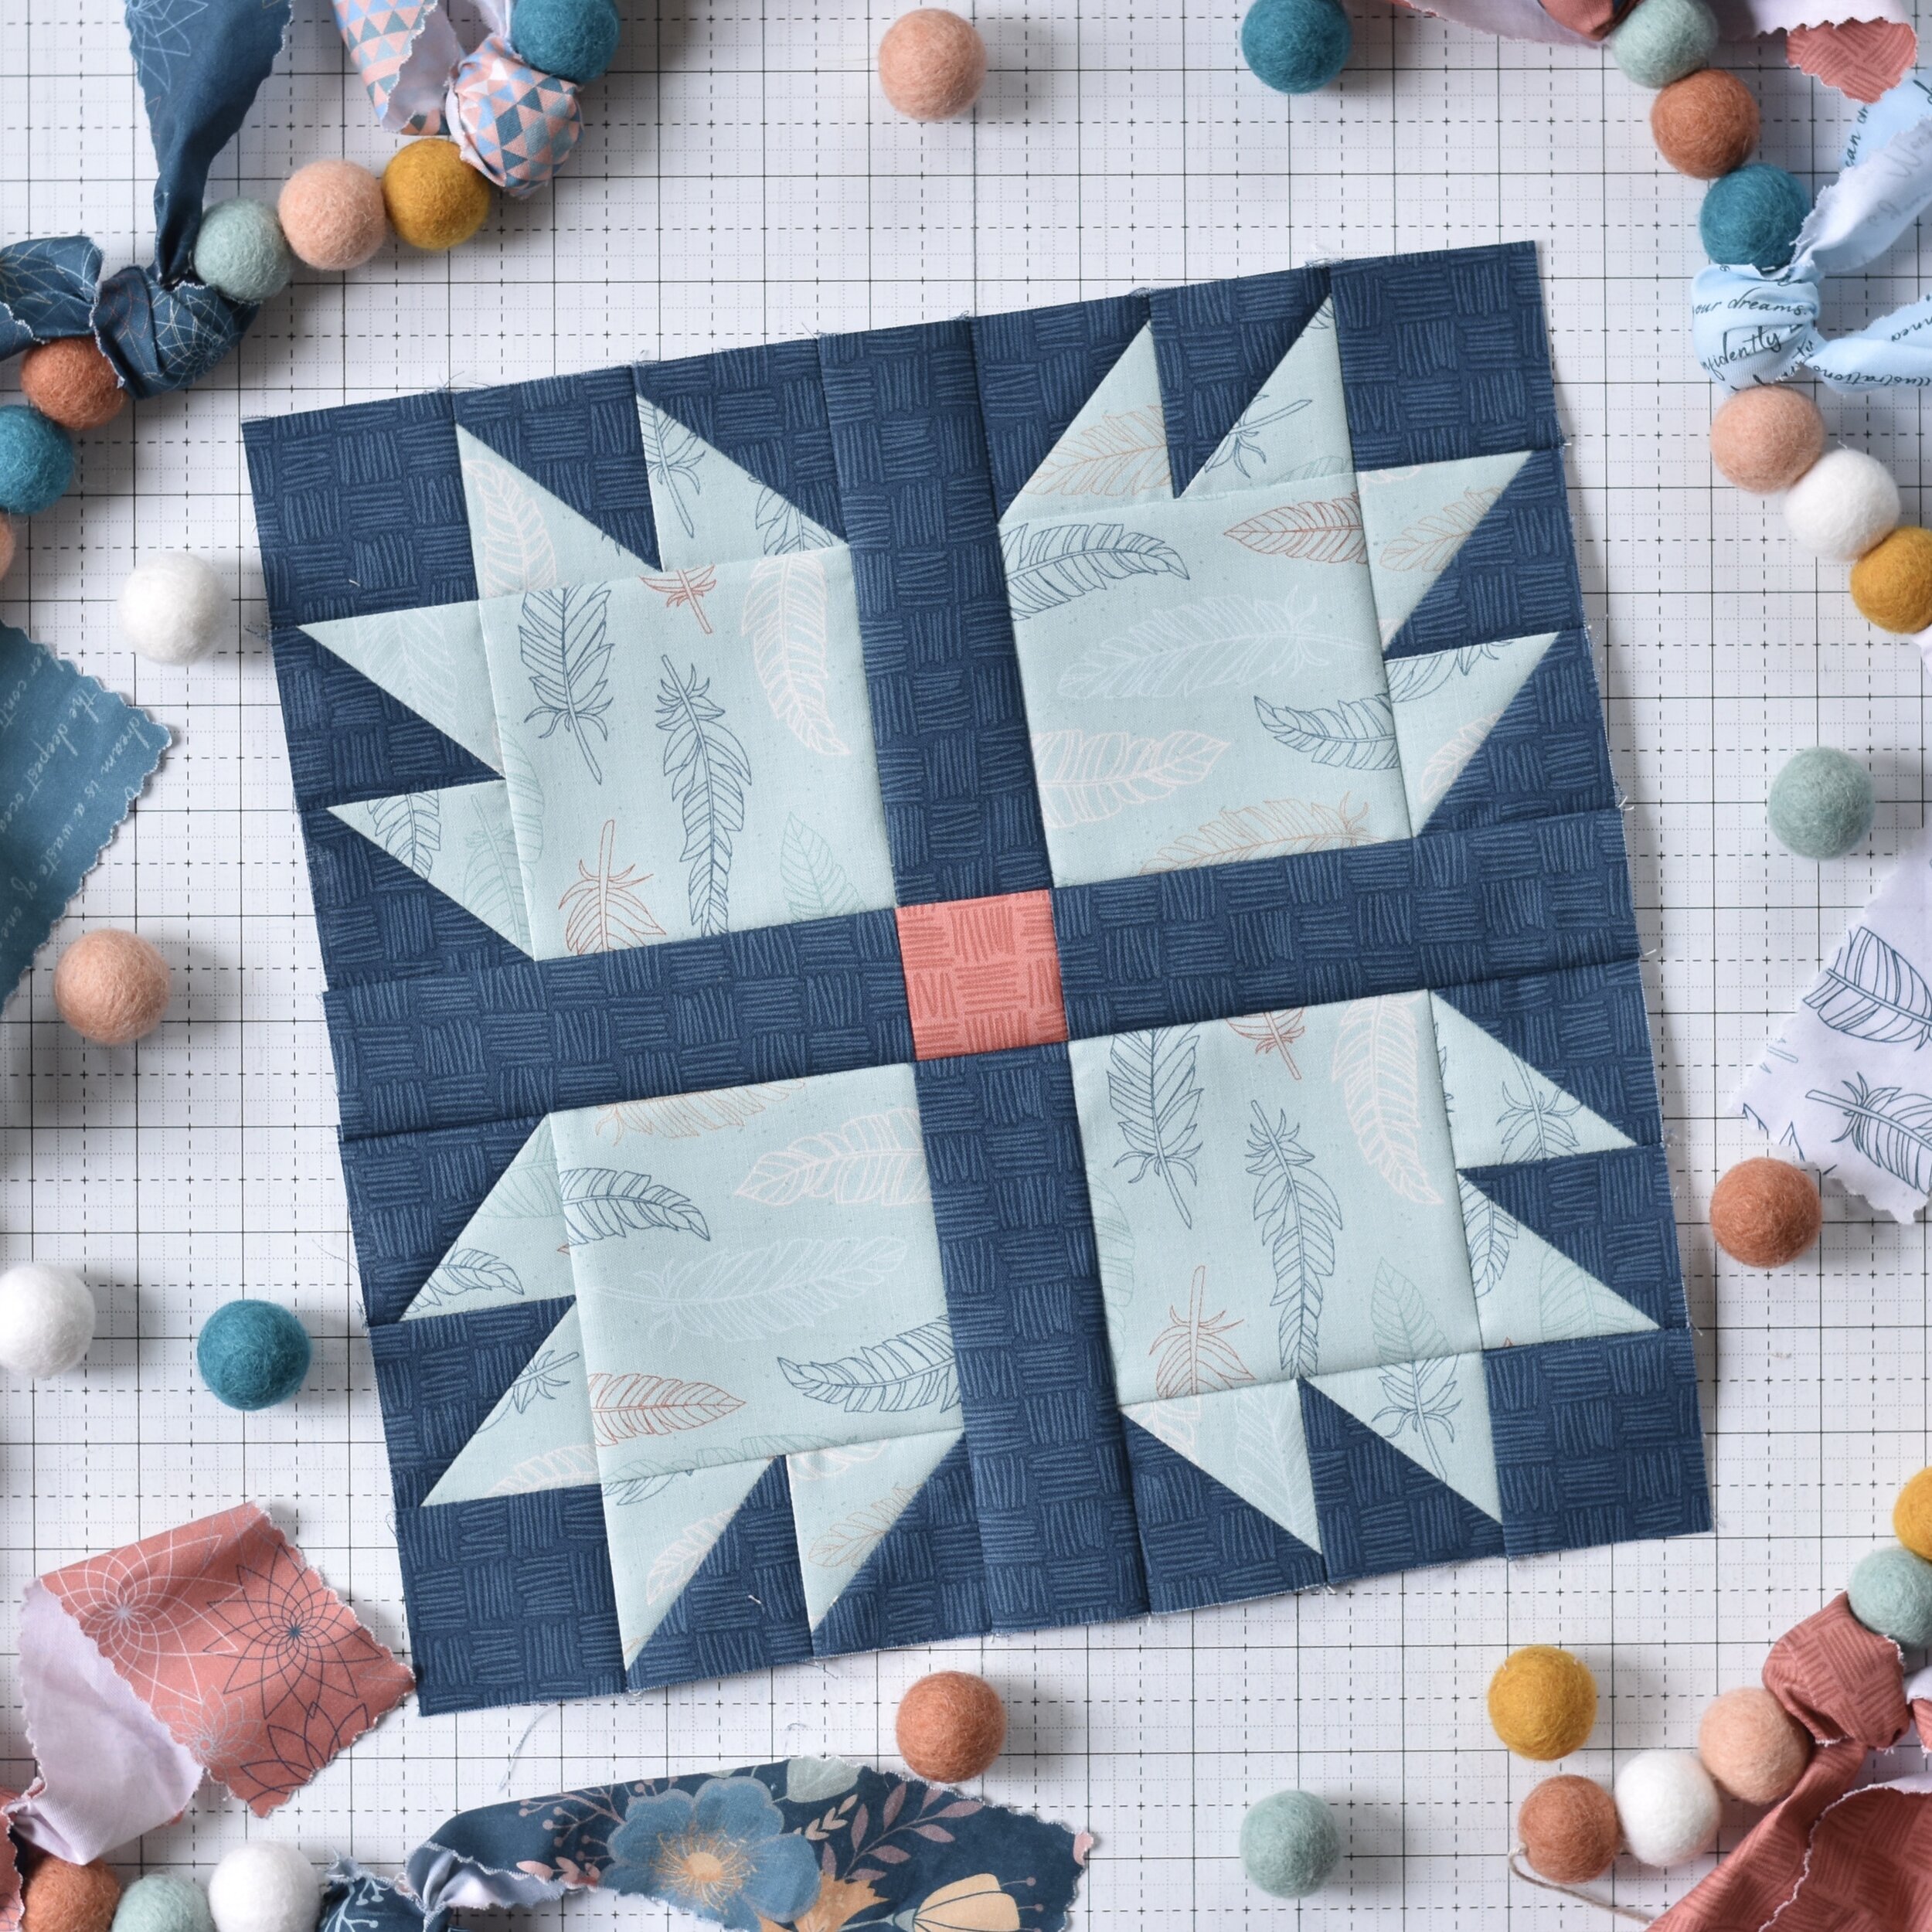
Once your half square triangles are pieced and trimmed, it’s time to sew the block together. Lay out your block pieces as shown and sew together according to the diagram below. When you are done, your blocks will measure either 6 1/2” or 12 1/2”.

I hope you join us on the classic quilt block challenge. It’s all just for fun while we’re stuck at home during this crazy time in our world.
Amanda