
My Town Quilt Blocks {free tutorial!}
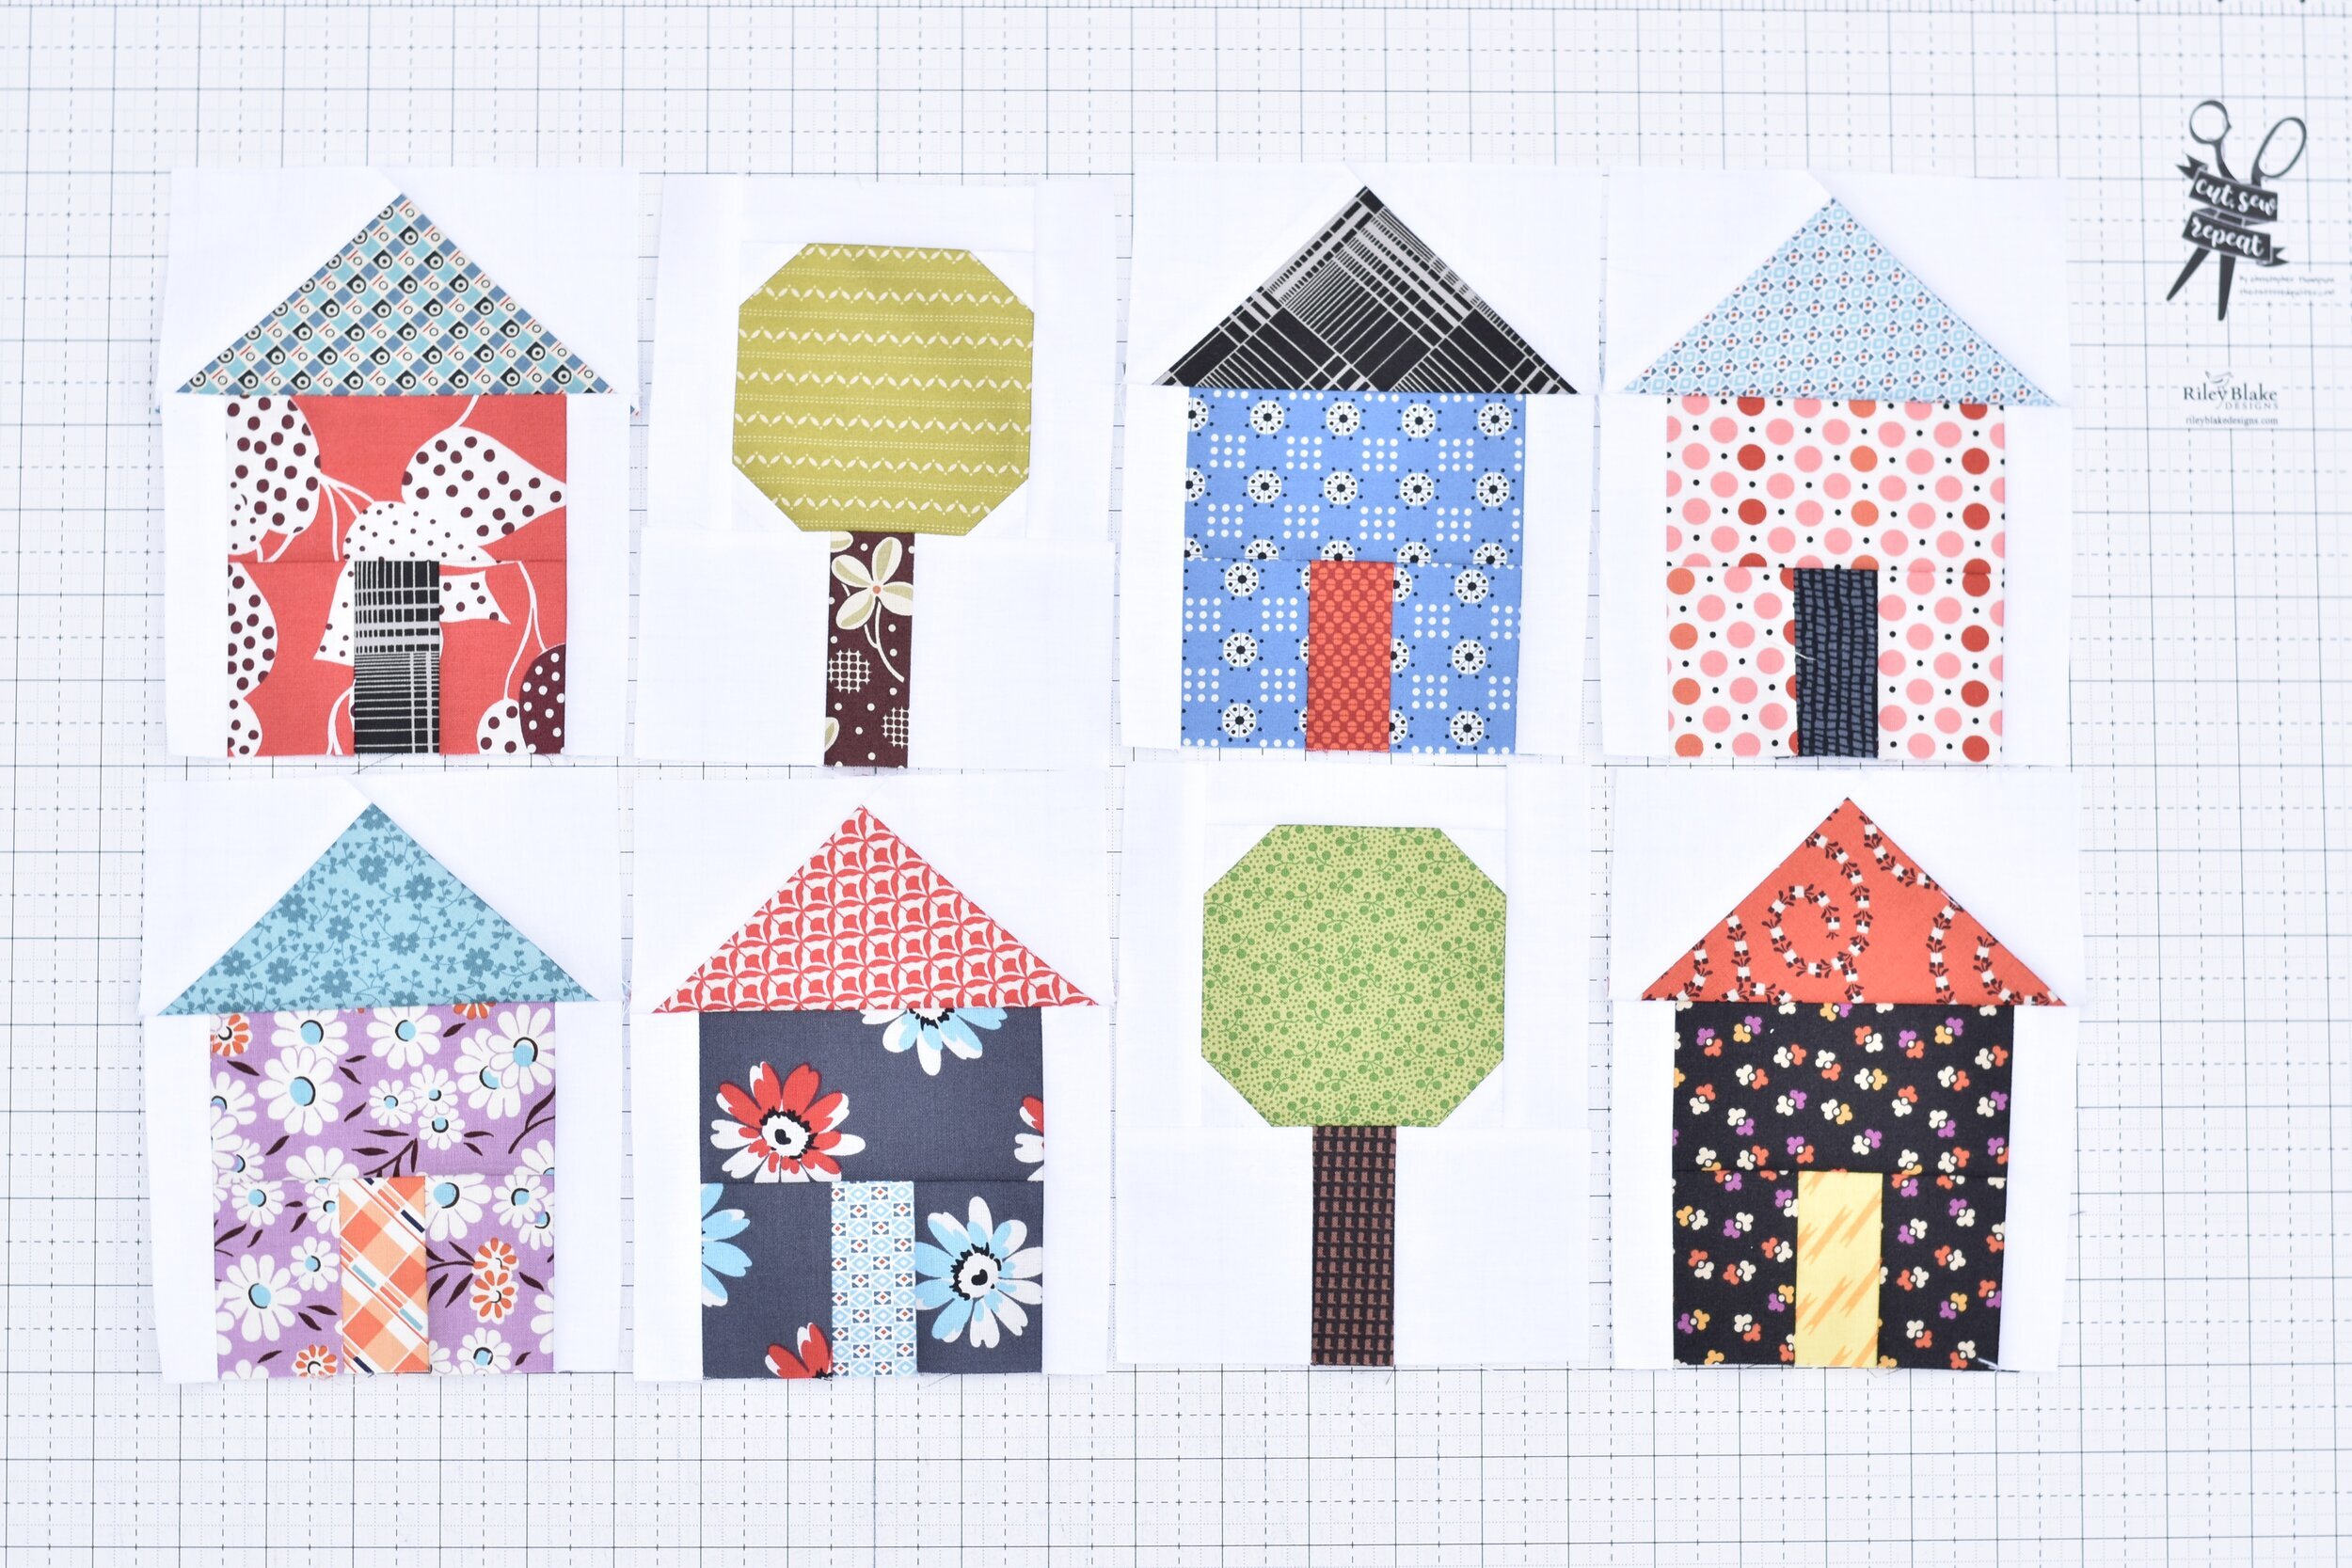
When I shared these cute blocks I made on Instagram, they seemed to be a big hit. A number of you asked for a tutorial so that you could make your own scrappy little town and I’m happy to oblige. :)
I was inspired by a few Village quilts I saw popping up on social media and realized that my collection of Denyse Schmidt 5” squares would be perfect in a quilt like this! Denyse has long been my all time favorite fabric designer. I couldn’t count the number of quilts I’ve made over the years that have included some of her fabrics. I may be biased, but don’t they look great in these blocks?!?
As I mentioned, I was inspired by the Village quilt (click here for the free pattern), but wanted to use the most of my 5” squares, have the entire “house” portion be the same fabric and also wanted to see some light between the houses. After coming up with the house sketch, I knew that My Town would also require some cute trees. The trees are simple in style, but really help to showcase the fun prints.
Below are instructions to make the house and tree blocks. I’m including cutting instructions if you are using 5” charm squares because that is what I used and I know a lot of us have several charm packs sitting around begging to be put into something fun!
My town house block
Material Requirements:
2 print charm squares (1 for the house and 1 for the roof/door)
Background fabric - One - 4” square (cut in half on the diagonal) and Two - 1” x 4 1/2” rectangles
Cutting:
For the “house” fabric, you will need: One - 2 1/2” x 4 1/2” rectangles and Two - 2” x 2 1/2” rectangles. See below for a charm square cutting diagram.
For the “roof/door” fabric, you will need: One - 5” square cut in half on the diagonal and One - 1 1/2” x 2 1/2” rectangle. If cutting from a charm square, you will cut the rectangle from one the triangles created when cutting on the diagonal. You will notice in my blocks that I mixed up the doors and roofs in each block to make them even more scrappy.

Block Assembly:
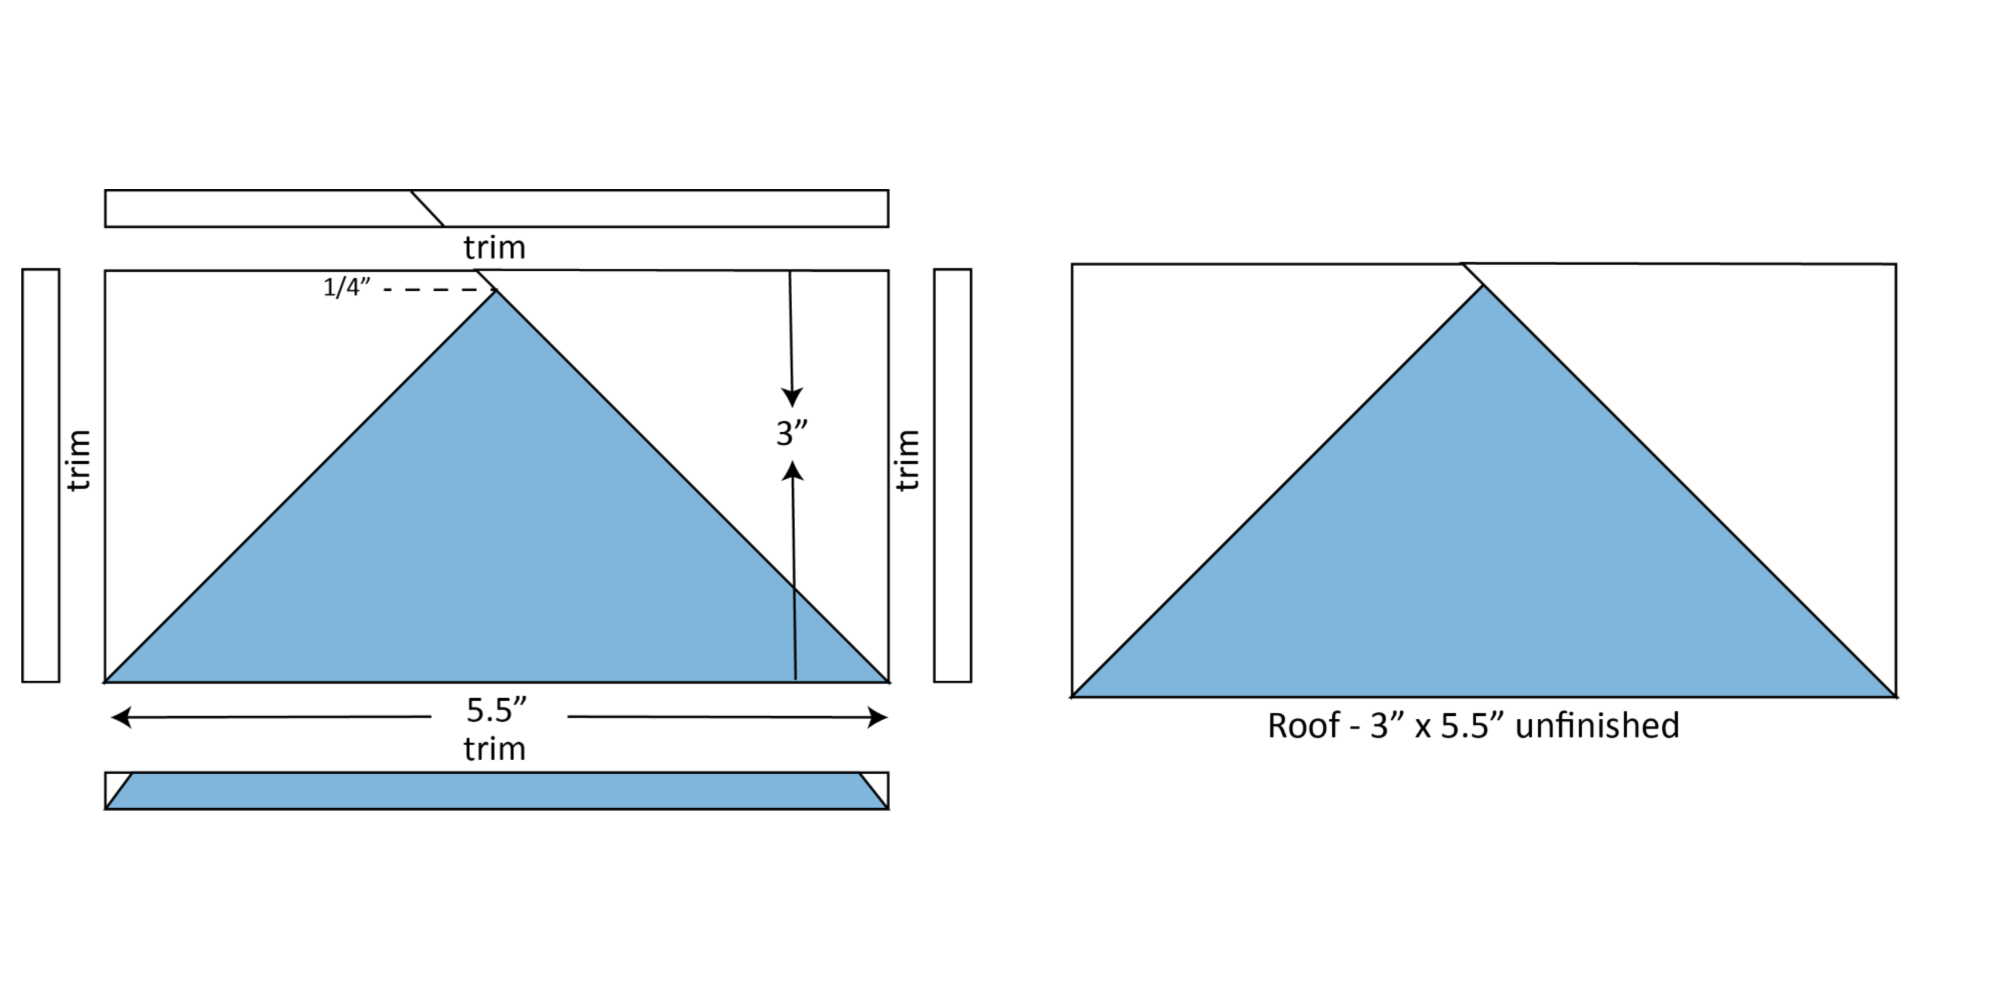
To make the roof, select your roof triangle and the 4” background triangles.
Sew a 4” background triangle to the roof triangle as shown below, press and trim. Add a 4” background triangle to the same roof triangle and press.

Trim your roof section to measure 3” x 5 1/2” as shown below in the trimming diagram.
To make the house, select the following:
One - 2 1/2” x 4 1/2” house rectangle
Two - 2” x 2 1/2” house rectangles
One - 1 1/2” x 2 1/2” door
Two - 1” x 4 1/2” background rectangles
Sew the small house rectangles to each side of the door.
Sew the large house rectangle to the top of the prior pieced section.
Sew the background rectangles to each side of the pieced house section.
Sew the roof to the top of the house.

Your completed My Town House Block should measure 5 1/2” x 7”.

My town tree block
Material Requirements:
2 print charms (1 for the tree and one for the trunk - note you can cut several trunks cut from one 5” charm square)
Background fabric - Two - 2 1/2” x 3” rectangles, One - 1” x 4” rectangles, Two - 1 1/4” x 4 1/2” rectangles and Four - 1 1/4” squares
Cutting:
For the “tree” fabric, you will need: One - 4” square.
For the “trunk” fabric, you will need: One - 1 1/2” x 3” rectangle. If cutting from a charm square, you can get four trunks cut from one charm as shown in the cutting diagram below.

Block Assembly:
Select your 4” tree square and four 1 1/4” background squares.
Sew a 1 1/4” background square to the tree square as shown below, trim and press. Continue to sew the remaining 1 1/4” background squares to each of the tree corners, trim and press.

To complete the tree, select the following:
One - 1” x 4” background rectangle
Two - 1 1/4” x 4 1/2” background rectangles
Two - 2 1/2” x 3” background rectangles
One - 1 1/2” x 3” trunk rectangle
Your pieced tree section from above
Sew the 1” x 4” background rectangle to the top of the pieced tree section.
Sew the two 1 1/4” x 4 1/2” background rectangles to each side of the pieced tree section.
Sew the two 2 1/2” x 3” background rectangles to each side of the trunk.
Sew the pieced trunk section to the bottom of the pieced tree section.

Your completed My Town Tree Block should measure 5 1/2” x 7”.

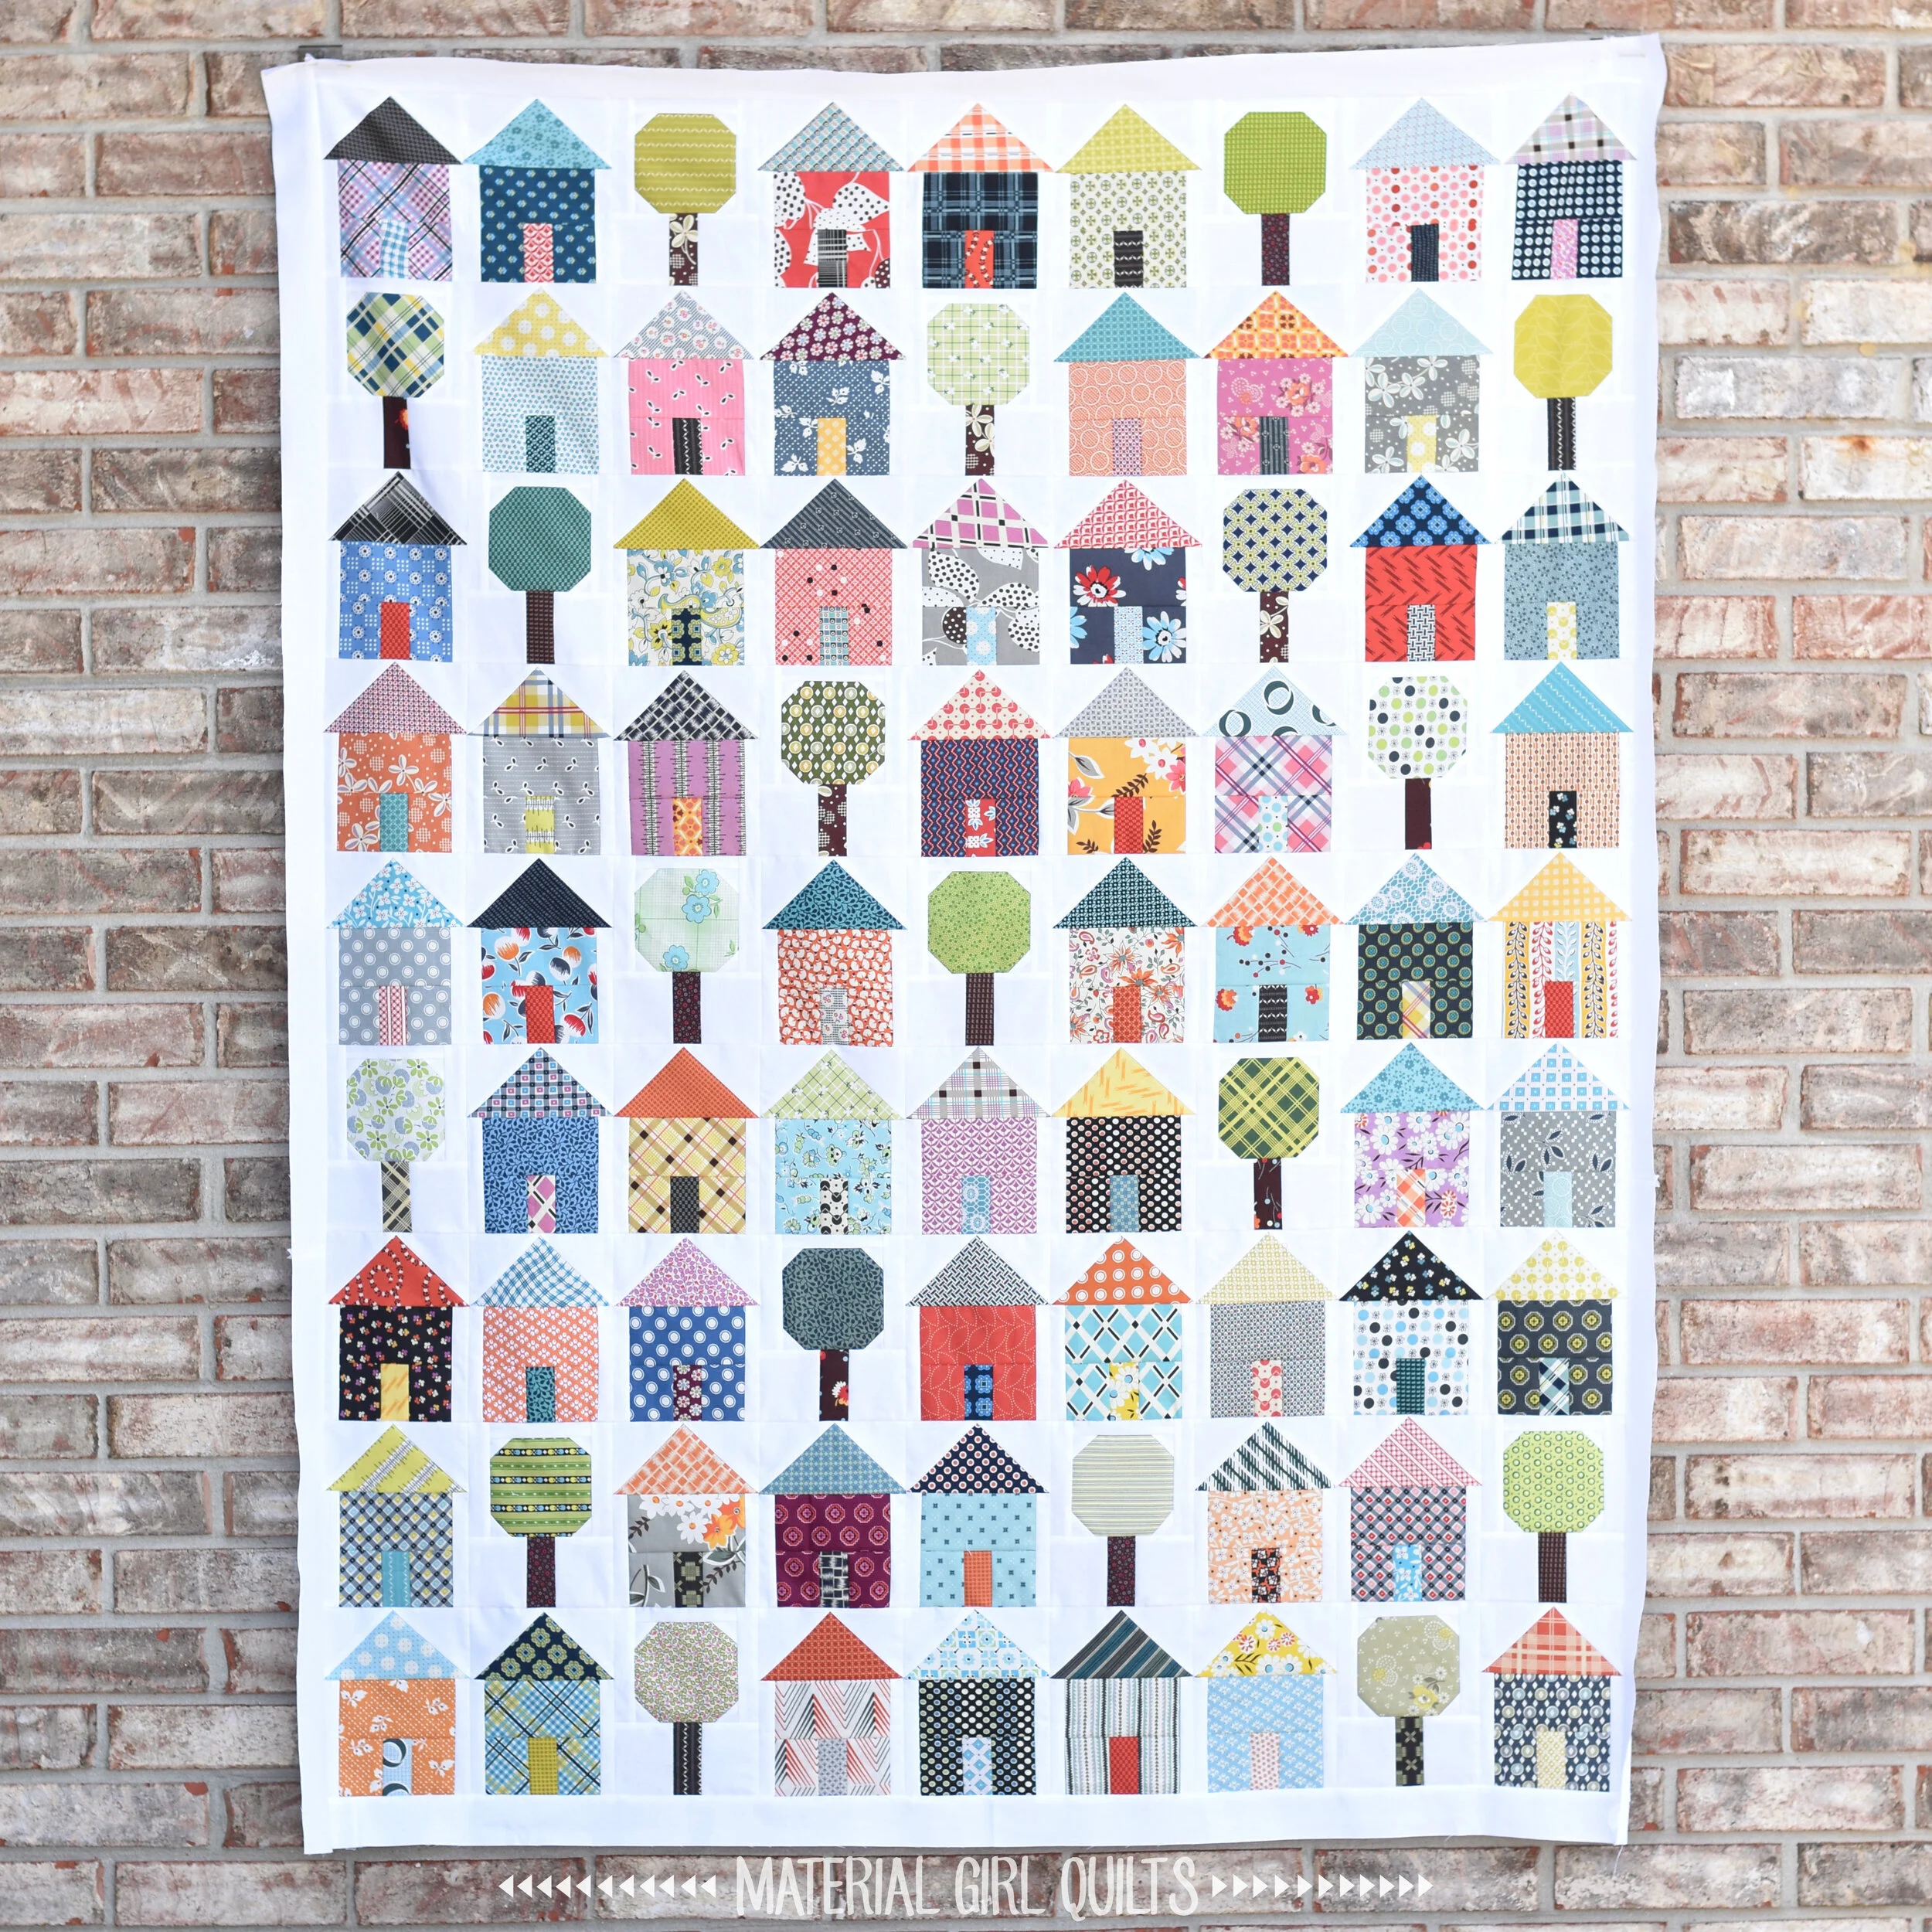
I made a total of 62 houses and 19 trees and put them together into this super colorful, scrappy quilt top. Then I finished it off with borders that were cut at 2” wide. The finished quilt measures 48” x 61 1/2”.
If you make a town of your own, I’d love to see it! Please use the hashtag #mytownquilt on social media and tag me. Now I just need to figure out which of these houses I want to move into ;-) It’s too difficult to choose a favorite, I might have to move houses every week…HA!
Amanda